You can insert a tick symbol in Word using the Symbol dialog box or keyboard shortcut.
It can be a difficult symbol to find, hidden amongst the myriad of symbols that Microsoft Word provide.
In this tutorial, we will see how to insert a tick mark in Word easily by using its character code 252 to find it.
Insert Tick Symbol in Word Video
How to Insert a Tick Mark in Word
You can insert a tick or check mark symbol in a Microsoft Word document anywhere you like.
- Click in the document where you want to insert the tick mark.
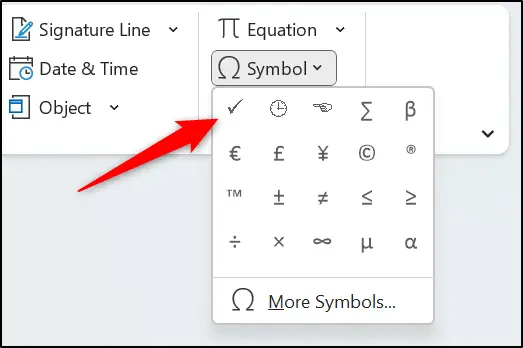
- Click the Insert tab on the Ribbon.
- Click the Symbol button and select More Symbols from the list.

- Select Wingdings from the Font list.
- In the Character code box, type 252.
You can see the Wingdings tick symbol beside the cross and check mark symbol.

- Click Insert.
- The tick mark is inserted, though the Symbol window remains open. Click Cancel to close it.
After using it, the tick mark will be added to the Recently used symbols list in the Symbol dialog box, and from the Symbol list on the Ribbon. Putting a tick in Word will now be much faster in the future.
Assign a Keyboard Shortcut for the Symbol
If it is used very often, it might be worth creating your own keyboard shortcut for inserting a tick in Word.
Open the Symbol dialog again by clicking Insert > Symbol > More Symbols.
No shortcut key is assigned for the tick symbol by default. Some symbols do have a ready-to-use shortcut.
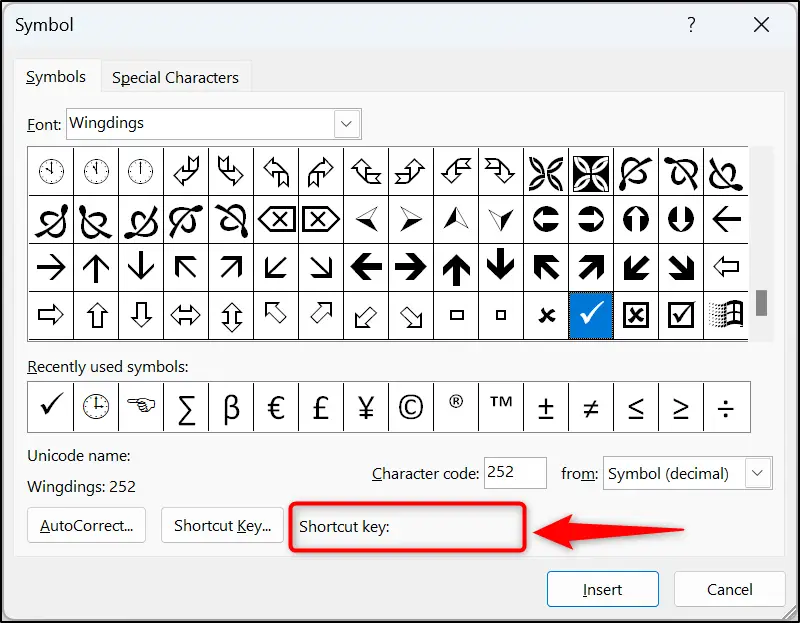
Click the Shortcut Key button.
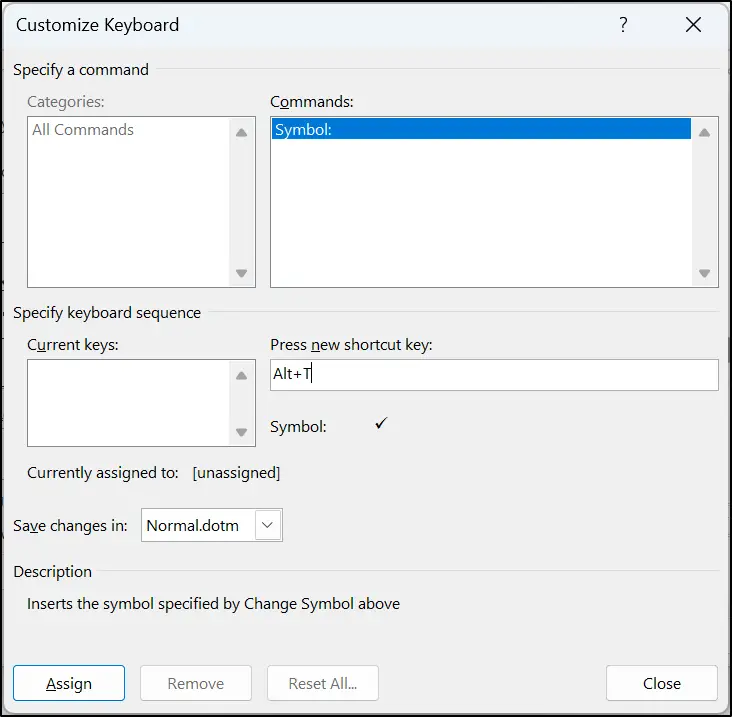
Press the shortcut key combination that you want to assign. In this example, Alt + T has been used and Word informs me that this keyboard shortcut is currently unassigned.
Note: The Alt + T keyboard shortcut is a legacy shortcut for accessing the Tools menu.
Click Assign.
This change has been applied to the Normal.dotm template so affects all Word documents. You can assign shortcuts to specific documents and even move them between documents, but that is beyond the scope of this tutorial.
Click Close.
We now have a tick shortcut key in Word making it easy to insert the tick symbol in the future.
Conclusion
In this tutorial, we saw how to tick in MS Word using the Symbol dialog box and how to assign a tick shortcut key. I hope it was very useful.
You can also insert a tick symbol in Excel using a few different methods. In Excel, you can return a tick as the result of a formula in addition to the methods stated in this Word tutorial.


I was trying to add more symbold to my word.
I was reading this:
2.Click the Symbol button and select More Symbols from the list.
I did that but there is NO BOX to get “More Symbols”
On the contrary to the previous comments, i found this information very helpful. Thankyou Alan. You should be proud of your achivements and i wish you success in your future endeavours
I also found this informative Alan, thank you very much. As you can see, i have an almost identical name to dilbert but i assure you we are not related. Just ignore that imbesile, he’s just trying to troll you. Keep up the good work mate.
Alan, I am slightly confused with this information I cannot insert anything into my document, it’s too hard. I found this information helpful but I am just too vulnerable to making silly mistakes. Could you offer your assistance, all my love Briannah x
solved my problem, excellent!
Thank you for the help you have rendered. Very useful.
I wish you the best.
Jayakumar (Mr),Singapore
Thanks a lot. Very clear and simple instructions. worked fine.
Very useful!
Super easy to follow, thank you!
Got it. Thanks.
This has made my life a little bit better. Thank you Alan!
Thank you, your information was very useful and easy to follow
Thank you!!
Hi
Thanks for your helpful advice, I was having problems locating the tick symbol. Thanks for your help
That was lovely. Thank you Alan, the explanation is clear and easy to follow. I made in it in a blink of an eye.
Great. Perfect – simple instruction just the answer I needed thanks.
Sir, you are a gentleman and a scholar! I am filling out endless application forms with boxes that don’t let you enter things. By smugly adding tick boxes I think I will be one step ahead of the game 🙂
Thanks i got it.
Thank you. Very useful
Hmm it looks like your website ate my first comment (it was super long) so
I guess I’ll just sum it up what I wrote and say, I’m thoroughly enjoying your blog.
I as well am an aspiring blog blogger but I’m still new to the whole thing. Do you have any helpful hints for rookie blog writers? I’d certainly appreciate it.
Thanx …
This information is very helpful for me…. 🙂
Hi . I teach computers to a couple of senior groups as a community service. Is it okay if I use some of your tutorials. My 2 groups are into any interesting tutorials
Regards Jack
Hi Jack,
Sure. These tutorials are available to hopefully help people be more productive in using the software.
Thanks.
THANK THE LORD